
|
|
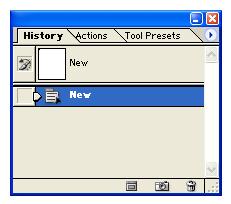
Using History Palette:
The History Palette lets you jump to any recent state of the image created during the current working session. Each time you apply a change to an image, the new state of that image is added to the palette.
For example, if you select, paint, and rotate part of an image, each of those states is listed separately in the palette. You can then select any of the states, and the image will revert to how it looked when that change was first applied. You can then work from that state.
Guidelines for using the History Palette:
1) Programme-wide changes, such as changes to palettes, color settings, actions and preferences are not changes to a particular image and so are not added to the History palette.
2) By default, the History palette lists the previous 20 states. You can always change the number of states in Preferences. Older states are automatically deleted to free more memory for Photoshop. To keep a particular state throughout your work session, make a snapshot of the state.
3) Once you close and reopen the document, all states and snapshots from the last working session are cleared from the palette.
4) By default, a snapshot of the initial state of the document is displayed at the top of the palette.
5) States are added from the top down. That is, the oldest state is at the top of the list, the most recent one at the bottom. Each state is listed with the name of the tool or command used to change the image.
6) By default, selecting a state dims those below. This way you can easily see which changes will be discarded if you continue working from the selected state.
You can also use the following few instructions for using History Palette
You can use the History palette to revert to a previous state of an image, to delete an image's states, and in Photoshop, to create a document from a state or snapshot.
Photoshop History palette A. Sets the source for the history brush B. Thumbnail of a snapshot C. History state D. History state slider
To display the History palette:
Choose Window > History, or click the History palette tab.
To revert to a previous state of an image:
Do any of the following:
- Click the name of the state.
- Drag the slider at the left of the state up or down to a different state.
- Choose Step Forward or Step Backward from the palette menu or the Edit menu to move to the next or previous state.
To delete one or more states of the image:
Do one of the following:
- Click the name of the state, and choose Delete from the History palette menu to delete that change and those that came after it.
- Drag the state to the Trash button to delete that change and those that came after it.
- Choose Clear History from the palette menu to delete the list of states from the History palette, without changing the image. This option doesn't reduce the amount of memory used by Photoshop.
- Hold down Alt (Windows) or Option (Mac OS), and choose Clear History from the palette menu to purge the list of states from the History palette without changing the image. If you get a message that Photoshop is low on memory, purging states is useful, since the command deletes the states from the Undo buffer and frees up memory.
Important: This action cannot be undone.
- Choose Edit > Purge > Histories to purge the list of states from the History palette for all open documents.
Important: This action cannot be undone.
To delete all of an image's states:
Choose Clear Undo/Redo History from the History palette menu.
Important: This action cannot be undone.
To create a new document from the selected state or snapshot of the image:
Do one of the following:
- Drag a state or snapshot onto the New Document button.
- Select a state or snapshot, and click the New Document button.
- Select a state or snapshot, and choose New Document from the History palette menu.
The history list for the newly created document will be empty.
To save one or more snapshots or image states for use in a later editing session, create a new file for each state you save, and save each in a separate file. When you reopen your original file, plan to open the other saved files also. You can drag each file's initial snapshot to the original image and thus access the snapshots again from the original image's History palette.
To replace an existing document with a selected state:
Drag the state onto the document.


No comments:
Post a Comment