
|
|
1: Open a black and white photo into Photoshop. The photo which I have chosen is one of my friend’s black and white Photo. You now have to follow few steps to make it into effect:

2: First of all we'll use a Solid Color adjustment layer. This will let you modify the color anytime you want so that you can tweak the colors once you're done all the painting. This is very important because we usually don't get the color correct the first time and need to make adjustments after we're done. To add a Sold Color adjustment layer, click on the "New Adjustment Layer" button in the Layers pallet. This should open a menu where you can select Solid Color.

3: Once you clicked "Solid Color", you'll see a "Pick a solid color:" window where you can select the color. First, we'll select the color of the skin. It doesn't matter if you pick the correct color; just make sure that the hue is correct. For example, for this skin tone I'll pick an orange. It doesn't matter if it's a light or dark orange, I'll just pick any orange for now because I can edit its layer when I have all the colors in place.

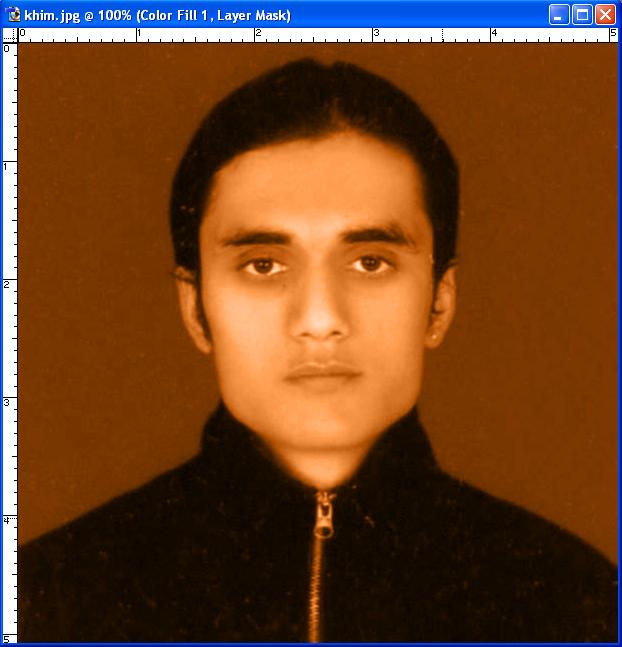
4: Now you should see a solid orange color in your image. In the Layers pallet, change the blend mode to Color. This will make this Sold adjustment layer only affect the color of the layer below. Your photo should now have an orange tint.

5: Now click on the layer mask in the layers pallet. It should have a white outline around the thumbnail. Once you've done that, it means you've activated the layer mask. Now select the eraser tool and erase all the areas that orange isn't part of the skin. If you make a mistake, simply select the brush tool and paint back the area that you accidentally erased. Use a brush with a hardness of about 50 or higher or else you'll get a halo effect in the final outcome. If you have objects other than the skin that's orange too, don't paint that orange because it might be a different orange. You want to only paint one object at a time and each object with its own layer. Why? Because that orange object could be a different orange than your skin. It may be hard to see it now, but once you have all the layers, you'll see that the slightest difference makes the biggest change. Also, if you happen to want that object to be a different color, you can change it without affecting everything else.


6: Now repeat those steps for the rest of the image except for the background. As you can see in the image below, the pink layer is for the lips and blue is for background. One is for the background and another is for his lips. Now the colors may look way too vibrant right now, but don't worry because we can fix that by modifying the adjustment layer color.

7: Look at the image below. See what a big difference the color makes? What I did was I double clicked on each layer (the color thumbnail) and adjusted the color. I only picked the same color with a different saturation and lightness. Now I had to go back into a few layer masks to touch up some areas, so if there isn't anything perfect, you can fix it up right now and not having to worry about undoing a bunch of steps and redoing everything. This is the power of non-destructive adjustment layers and layer masks.

So try it with some other Black and White Photos and see the difference. Thanks......
Please Click the following link to start downloading- Its Free:
Download Various Types of Fonts and Other Exciting Software for Free
Download Various Types of Fonts and Other Exciting Software for Free


No comments:
Post a Comment